SLAC Public
To use SLAC's Public Installation:
- Check Current platforms supported.
- Fulfill Prerequisites: Basic.
- Modify Your SLAC Public Environment to access external libraries.
Note: If you want to run FRED on your desktop, see:
To use the ScienceTools on SLAC Public:
Tip: Be sure to use the optimized version (e.g., rh9_gcc32opt) of Science Tools when performing an analysis. The optimized versions run ~5 times faster than the debug versions.
Note: The ScienceTools are located in the builds directory; for example:
/nfs/farm/g/glast/u30/builds/rh9_gcc32opt/ScienceTools/ScienceTools-v9r15p2.
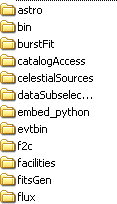
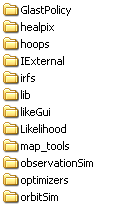
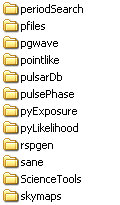
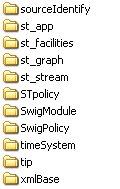
ScienceTools-v9r8p1 Directory Structure:
- Determine which release of ScienceTools you wish to use (e.g., ScienceTools-v9r15p2).
- Add /nfs/farm/g/glast/u30/builds/rh9_gcc32opt/ScienceTools/ScienceTools-v9r15p2/bin to your path.
Note: The bin directory contains the standard set of tools for execution. (Linux & Mac - these are wrapper scripts which set up your environment for you as necessary).
- Create a PFILES environment variable that points to the pfiles directory for the release version you've selected.
- From the command line, you can now execute any of the ScienceTools for the version you've selected.
Each script corresponds to one of the tools available in the Science Tools distribution.
Other Useful Tools
To run HEADAS software (FTOOLS and XANADU), SAOImage ds9, Xspec, and SuperMongo (sm) on SLAC Public, setup scripts for .csh and .sh are available at: $GLASTROOT/applications/astroTools/
- Log on to a SLAC Public machine.
- Enter: cd $GLASTROOT/applications/astroTools/
Then enter: ls
- Determine which setup script to use by entering: printenv SHELL
If the response is /bin/tsch, use the .csh setup script.
For example, enter:source $GLASTROOT/applications/astroTools/astrotools_setup.csh
If the response is for a bash shell, use the .sh setup script.
Note: You will find:
- ds9
in the bin directory - All of the FTOOLS
in /headas/ftools/i686-pc-linux-gnu-ibc2.2/bin
Tip: To access FTOOLS Help, enter: fhelp, then enter the name of the tool. Tutorials and Help files are also available at:
http://ftools.gsfc.nasa.gov/docs/software/ftools/ftools_menu.html
Testing Your Setup
Running a simple tool from the command line
- Get a test FITS file from either the LAT Data Server or the GSSC Data Server.
Let's get some Crab data:
Search Center (RA, Dec) = (83.6332, 22.0145)
Radius = 15 degrees
- At the command line we will start the gtselect tool by typing:
gtselect [gui=yes]
Input FT1 file [C:\glast\crab\crab_ft1.fits] :
Output FT1 file [crab_filtered.fits] :
RA for new search center (degrees) <0 - 360> [83.6332] :
Dec for new search center (degrees) <-90 - 90> [22.0145] :
radius of new search region (degrees) <0 - 180> [20] :
start time (MET in s) [220000000] :
end time (MET in s) [230000000] :
lower energy limit (MeV) [20] :
upper energy limit (MeV) [5000] :
Event classes (-1=all, 0=FrontA, 1=BackA, 2=FrontB, 3=BackB, 4=class A) <-1 - 4> [-1] :
Done.
Run ObsSim from python
At the command line, enter:
python
Python 2.5.1 (#65, Mar 30 2005, 09:13:57) [MSC v.1310 32 bit (Intel)] on win32
Type "help", "copyright", "credits" or "license" for more information.
>>> from ObsSim import ObsSim
>>> ObsSim()
The ObsSim gui should be displayed.
| Last updated by: Chuck Patterson 07/27/2009 |