Set Environment Variables (End-user):
Windows Desktop Installations
Changes are made from the Environment Variables graphical user interface (GUI) which can be accessed as follows.
- Open the System Properties window (Start-->Settings-->Control Panel-->Performance and Maintenance-->System).
Note: You can also open the System Properties Advanced window by right-clicking on the My Computer icon on your desktop and selecting Properties. Then select the Advanced tab.
- Select the Advanced tab.
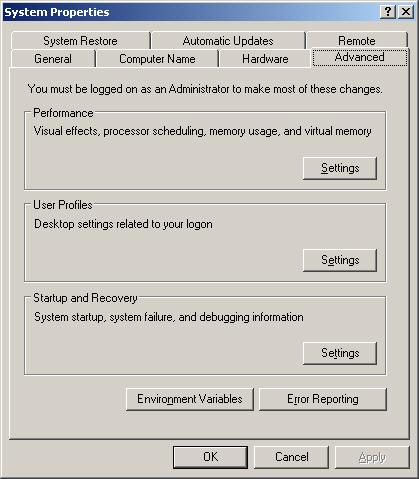
- Click on the Environment Variables button.
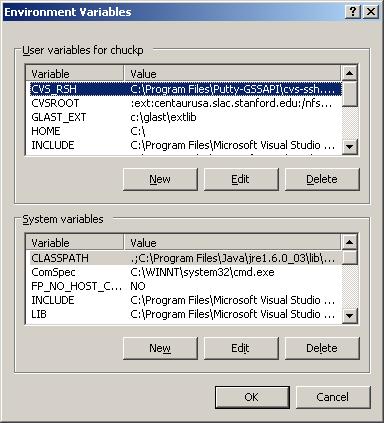
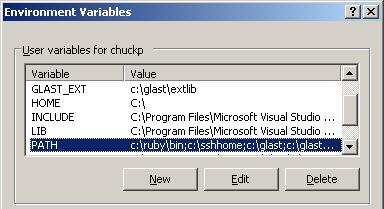
A window similar to the following will be displayed:
EXAMPLE
The following example assumes that you have installed WinCVS 1.3 in your C:\glast\tools directory and that you will be connecting to :ext:centaurusa.slac.stanford.edu:/nfs/slac/g/glast/ground/cvs using a secure shell.
Note: Modify the user variables, not the system variables.
- In the upper part of the window (i.e., User variables for...), click on the
 button. button.
The New User Variable GUI will be displayed.
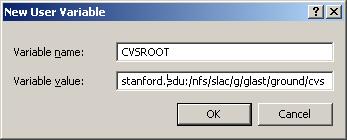
- Create a new environment variable called CVSROOT and set it equal to:
:ext:centaurusa.slac.stanford.edu:/nfs/slac/g/glast/ground/cvs
NOTE: If your account name on your local machine differs from your SLAC account name, you need to prepend your account name to the noric node name, as in:
:ext:youraccountname@centaurusa.slac.stanford.edu:/nfs/slac/g/glast/ground/cvs
- Click OK.
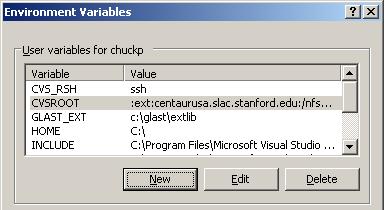
- Create another environment variable named CVS_RSH and set it equal to:
ssh
Your user variables should now look similar to:
- To update the PATH to include the CVS executable:
- Click on PATH, then click on the
 button. button.
- Add c:\glast\tools\WinCVS 1.3\CVSNT; to your PATH.
Don't forget the semicolon (;) at the end.
Note: In the example given, there is a space between WinCVS and 1.3).
- Click OK and close the windows.
Related Topics:
| Last updated by: Chuck Patterson
04/20/2005 |
|
|