Build and Run Gleam w. MRvcmt (SLAC Public)
This procedure details how to use MRvcmt on SLAC Public to: checkout the source code for a full GlastRelease; build Gleam; run both the test_Gleam and Gleam applications, and view the event outputs in FRED.
Prerequisites
- Determine the checkout package and which version of that package
you are interested in; then determine the CMT version for that package.
(Refer as necessary to the Release Manager.)
Part I: Obtain the Source Code Using MRvcmt:
- Login to SLAC Public. (Be sure you are logging in to noric.)
Note: If you are running on a Windows machine, be sure to launch your X-server (e.g., X-Win32 v 6.0, or higher); it must be running in the background.
- Change to your work directory.
- In your work directory, create a work subdirectory (e.g., v9r2) to contain the source code that you will be checking out.
- To launch MRvcmt, at the command line, enter: MRvcmt
- Refer as necessary to Setting up MRvcmt Options (SLAC Public), and set the first Cmt Options path so that it points to the work subdirectory you just created to contain the source code.
For example:
/nfs/farm/g/glast/u33/userName/mrvcmtWorking/v9r2
Note: Again referring to Setting up MRvcmt Options (SLAC Public), be sure the second path is defined correctly, and that the full path to your CMT executable is displayed in green.
- From the MRvcmt GUI, select:
Packages --> Checkout
The Checkout GUI will be displayed.
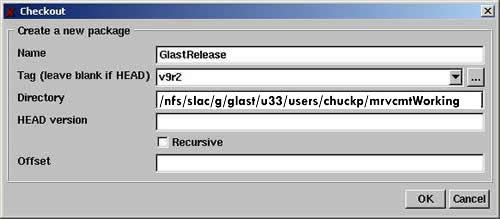
- Enter the Name of the package you want to checkout (e.g., GlastRelease).
- Enter the Tag (e.g., v9r2).
Note: If you click on the  button, a list of valid tags from the CVS repository will be built and available to you from the dropdown menu to the left of the button. button, a list of valid tags from the CVS repository will be built and available to you from the dropdown menu to the left of the button.
- Click the OK button.
Tip: You can also use the Offset field to checkout a package located in yourDirectory to build against a release. In the offset field, just enter:
/u33/users/yourDirectory/packageName
- In the MRvcmt GUI's Packages Tree, click on GlastRelease v6r6p1.
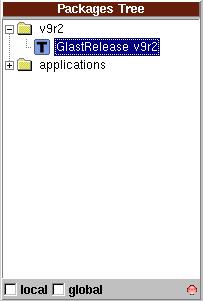
- Click on the
 Add button. Add button.
Follow the progress of the checkout under MRvcmt's 'output' tab.

When checkout is complete, all packages will be displayed in the Packages Tree, and the  message will be displayed in the status bar. . message will be displayed in the status bar. .
Tips:
- To highlight error messages in the output display, right click on the output page and select: highlight errors
- To clear the output display, right click on the page and select: clear all
Part II. Build the Package
- In the Packages Tree, select Gleam.
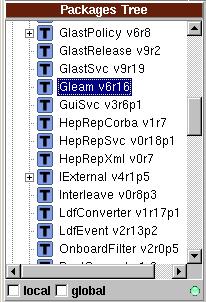
Note: The green light should be lit.
- Select local broadcast:

Note: If all of the dependent packages are in the same directory, you should check local broadcast; if they are in different directories, you should check global broadcast. |
- Click on the
 Config icon to launch cmt config on the package. Config icon to launch cmt config on the package.
Follow the progress of config under MRvcmt's 'output' tab. When it completes, the message will be displayed in the status bar.
- Again select local broadcast:
- Then, with the package (e.g., Gleam) still highlighted, click on the
 Make icon to launch make on the package. Make icon to launch make on the package.
After a short delay,  is displayed in the Status bar, and you will be able to follow the progress of the operation under the output tab. is displayed in the Status bar, and you will be able to follow the progress of the operation under the output tab.
Note: Building Gleam is a lengthy process and can take an hour, or more.
When the Gleam build has completed, the message will be displayed in the status bar, and a message similar to the following will appear in the output:
------> Gleam ok
------> (constituents.make) Gleam done
all ok.
Part III. Run Gleam
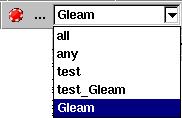
- From the list of constituent packages, select the Gleam application:
Tip: To override the application's jobOptions file, enter the path to your jobOptions file in the data entry field on the right. Include the name of the file (e.g., c:\glast\packages\jobFiles\jobOptions.txt).
- Click on the red Run application button
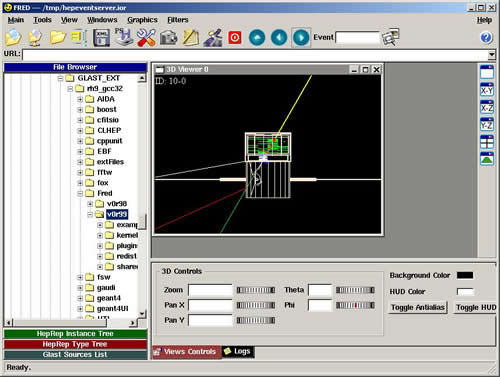
When the first events are available, you will get a message that the Corba .ior file has been made available. FRED should launch automatically.
- Click on the
 Next Event button to view the first event. Next Event button to view the first event.
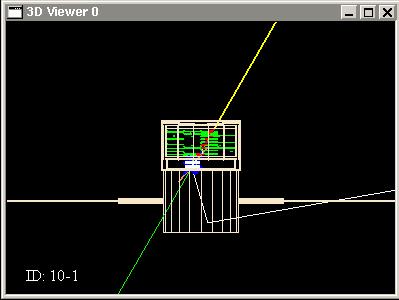
- Click on the Next Event button again to view the next event:
Note: Refer to the FRED Tutorial to explore additional functions of the viewer.
|