Graphical Interface
Calicoes provides a web-based graphical user interface.
Installation
First of all, you must have installed Pyrame’s XHR CGI on you HTTP server. See Pyrame’s installation documentation for instructions on how to do it.
Calicoes installation will create a symbolic link /var/www/html/phygui_rc -> /opt/calicoes/phygui_rc, which should enable operation without further configuration in most systems.
Using the interface
To use the GUI, just open a web browser and go to phygui_rc. This is typically localhost/phygui_rc.
Configuration tab
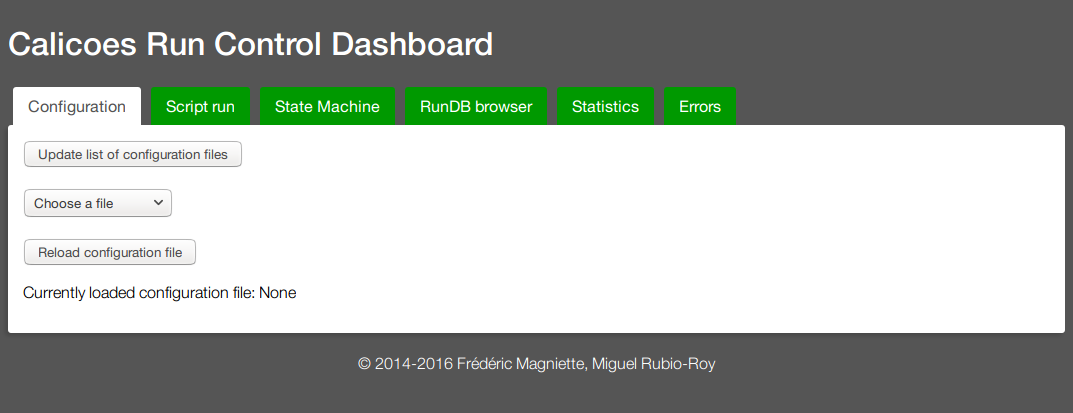
Figure 1: The configuration tab
Here you can see the available configurations in /opt/calicoes/config and choose among them. You can reload the list and the configuration at wish.
Note
To (re)load a configuration, the state machine needs to be in the UNDEFINED state if it already has a loaded configuration. The GUI will perform the necessary transitions to get to this state before loading the new configuration.
If you use a script that performs a load_config_file command, you don’t need to use this tab.
Script run tab
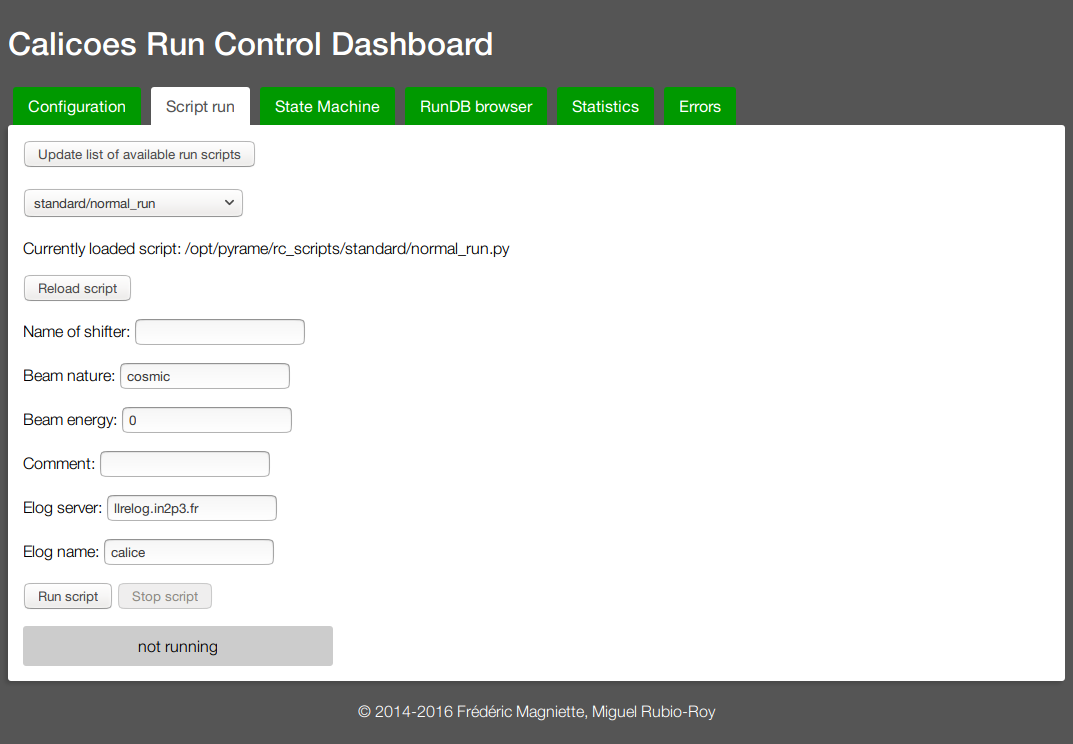
Figure 2: The Script run tab
In this tab you can see the scripts installed in /opt/pyrame/rc_scripts. Whenever you select one of them, the script will be loaded and a series of input boxes will be shown: one for each argument of its function NAME_run (see Pycaldaq). After filling the ones you need, you can start the script and see its progress (if the NAME_get_progress function is implemented) or its execution status. If an error happened, it will be shown in the Errors tab.
Once running you can either let it finish or stop it whenever you want.
State Machine tab
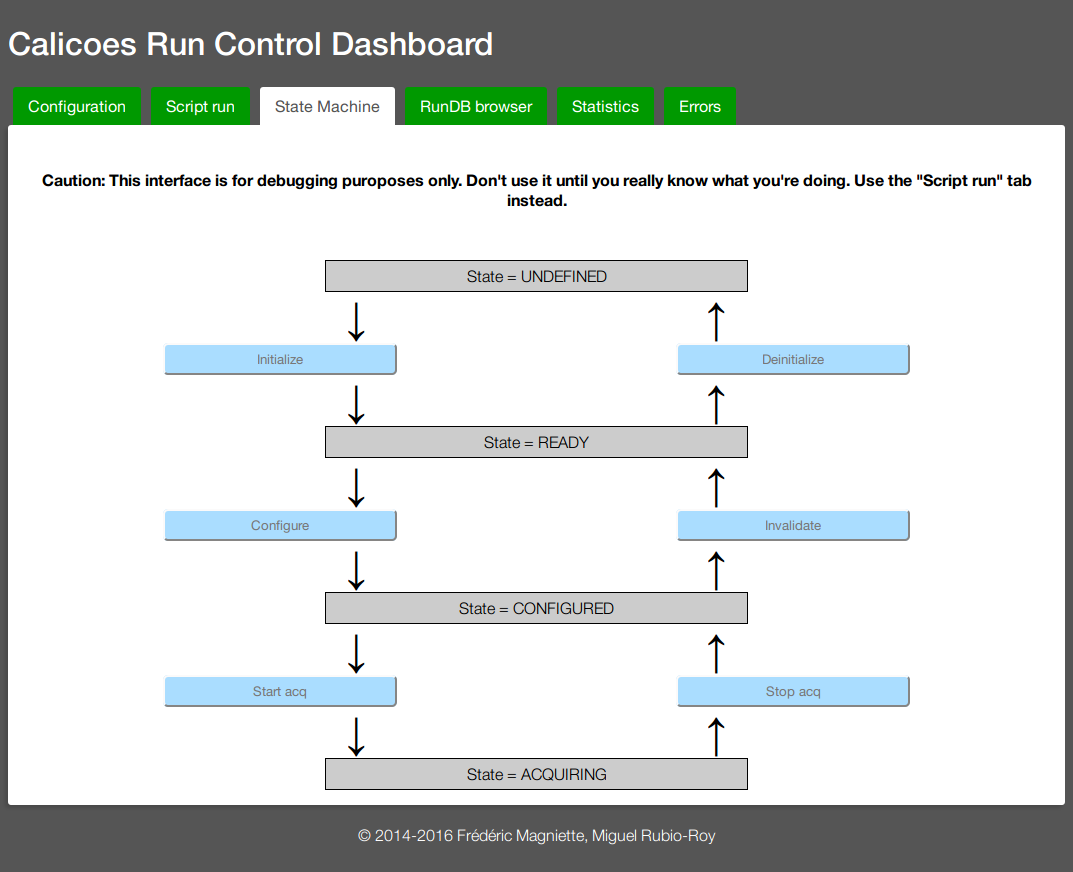
Figure 3: The State machine tab
Once a configuration is loaded, either manually on the Configuration tab or by a script, you can operate the State Machine (SM) tab.
The representation of the SM is updated regularly. If you’re using a script that performs transitions, you should be able to monitor here the different states it goes through.
At any moment you can click on a transition to perform it. If a parameter is necessary, a popup window will ask you for it.
Note
Beware that performing the start_acq transition in this tab is equivalent to using the startacq.sh command, so the Run Control will be bypassed and no information will be recorded on the RunDB.
RunDB browser tab
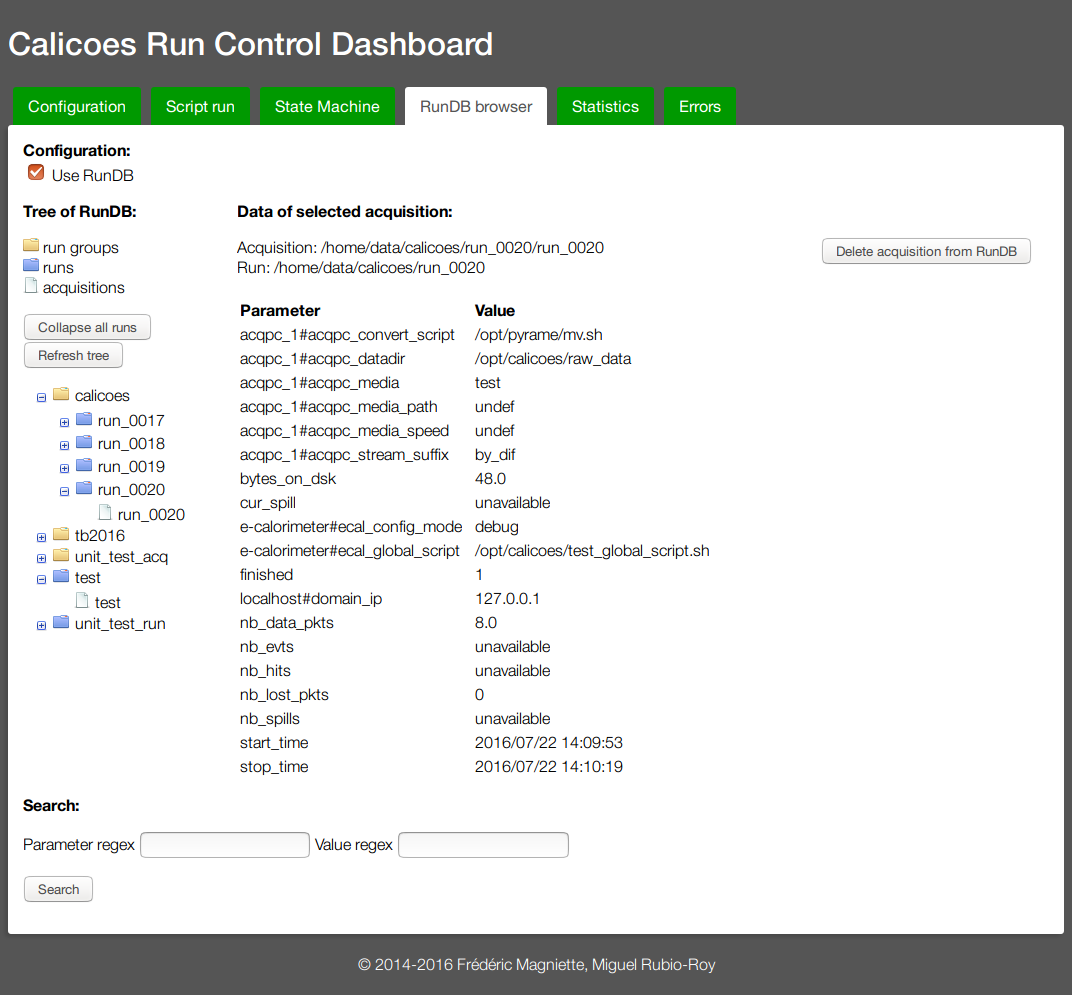
Figure 4: The RunDB browser tab
This tab allows you to browse the RunDB content. In figure 4 we have selected the acquisition run_0020, which is inside the run run_0020, which in turn is inside the run group calicoes.
Note
The Refresh tree operation can be slow when the RunDB is very populated. For this reason the update on the GUI is not done automatically. After starting an acquisition you’ll need to click on Refresh tree
The Search feature lets you use regular expressions to match either the parameter names or their values in acquisitions. The following search, for example, would return all acquisitions performed in July 2016:
- Parameter regex: start_time
- Value regex: 2016/07.*
Note
Regular expressions are a very powerful tool. Excellent tutorials, manuals and references can be found on the Internet.
Statistics tab
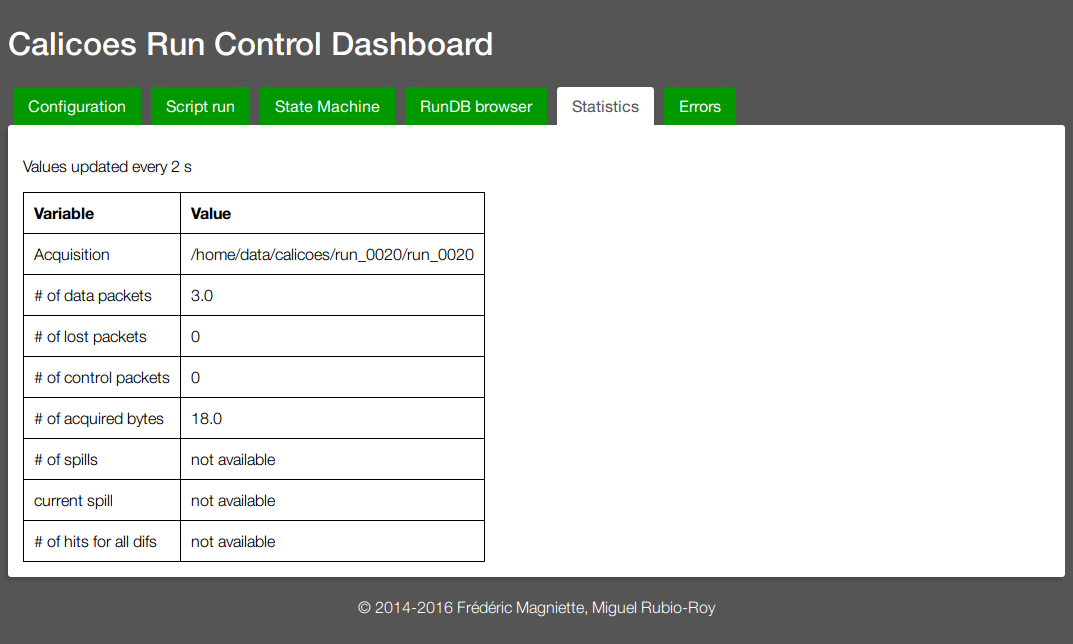
Figure 5: The run statistics tab
In the course of an acquisition, you can click on the statistics tab to see a number of monitoring data. It will remain unmodified until a new acquisition is started.
Errors tab
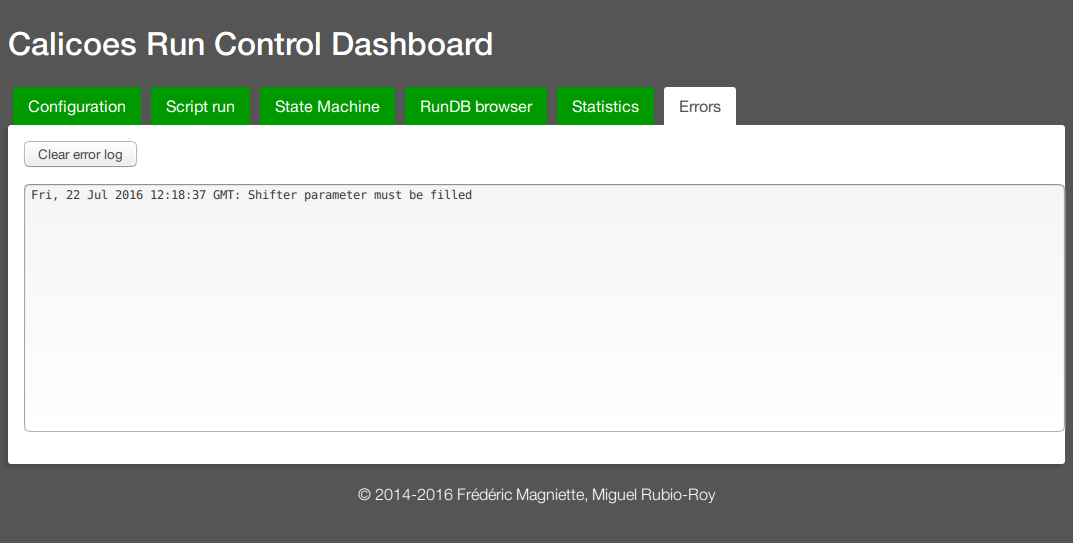
Figure 6: The errors tab
If an error occurs, the error tab becomes red. By clicking on it, you can see the error messages and clear them if you wish.